Tuesday, May 10, 2011

To Bakerella with.....


xox LOVE xox


A while ago one of our favourite bakers/bloggers Bakerella became ill. And being that Bakerella feels like family I decided to bake her somethin nice...in her honour i decided to bake a Red Velvet Cake. It is one of her favourites, and went for a love/heart theme. Her recipe will follow.

Here are all the ingredients for the most delicious and moist red Velvet Cake ever. And it is the sexiest colour of red that you have ever seen


Now the recipe is easy, combine all the dry ingredients together....


Then in a mixer combine all the wet ingredients. Slowly while mixing add the dry spoon by spoon to the wet ingredients....easy. It will make a beautiful wet runny batter.


Then I evenly divided the batter into two heart shaped tins. Too cute.


Now you can do this by weighing each tin and weighing the batter evenly or as I did use a 1cup measure and pour into the tins.


Give the tins a bit of a bang on the counter to rid any pesky air bubbles and settle the ingredients. And pop in the oven.


When they emerge they are dark and moist and glorious


After leveling them off for the frosting you can see how moist on the inside.


Yummmmm. Want another pic here you go.....


mmmmm Moist +++


While the cakes were baking I whipped up a delicious Cream Cheese frosting


Perfect accompanyment for this cake.


And after cooling the cakes I divided the frosting into thirds.


1 third went into the middle of the cake, 1 third went to frosting the outside of the cake


and the other third went into my piping bag for experimentation


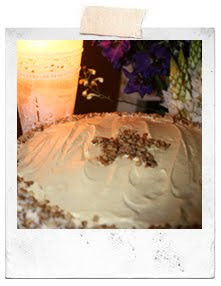
Sorry about the photo it was getting dark in my kitchen :D


I decided on topping the outer edge of the cake with swirl from my large star tip


and around the bottom edge with a little shell boarder.


Then topped the swirles with the cutest little heart Jimmies.


Adorable,


And I hope that even though Bakerella couldn't try my cake


She can rest knowing the she inspires us everyday with her strength


And widens our hips with her cooking


Please visit her blog listed in the links section


And let her inspire you to bake.....


Bakerella's Red Velvet Recipe


2 1/2 cups all purpose flour
2 cups sugar
1 Tablespoon cocoa
1 teaspoon salt
1 teaspoon baking soda
2 eggs
1 1/2 cups oil
1 cup buttermilk
1 Tablespoon vinegar
1 teaspoon vanilla
2 oz. red food coloring

Preheat oven to 350 degrees.
Grease and flour two 8 inch cake pans.
Lightly stir eggs in a medium bowl with a wire whisk. Add remaining liquid ingredients and stir together with whisk until blended. Set aside.
Place all the dry ingredients in your mixing bowl and stir together really good with another wire whisk.
Add wet ingredients to the dry ingredients and mix on medium-high for about a minute or until completely combined.
Pour into cake pans and then drop the pans on the counter a few times to release any air bubbles.
Bake for about 30 minutes or until a toothpick inserted comes out clean.
After about ten minutes, remove from pans and cool completely on a wire rack. I also cover in plastic wrap while the cakes cool.
Then make the frosting

Cream Cheese Frosting

8 oz. cream cheese, room temperature
1 cup butter, room temperature
1 teaspoon vanilla
6 cups confectioners’ sugar

Sift sugar and set aside.
Beat cream cheese and butter on high until creamy. Add vanilla.
Then, add the sugar in batches. Scrape down the sides in between each addition.
And frost away

Tuesday, March 1, 2011

Lemon Meringue Cupcakes


There's nothing I love more than Cupcake. They are so beautiful, only your imagination limits the flavours, combinations and decoration. And they are the perfect size to satisfy your sweet tooth, without the guilt of eating a HUGE slice of cake (as I am known to do :P)


My Friend from work was going on maternity leave so I decided that these cupcakes were the perfect thing for Afternoon Tea.


These cupcakes don't disappoint, they are lemony cakes with lemon butter in the middle and then beautiful, soft velvety meringue on top. Mmmmmm they were a hit.
This recipe was a bit mish mashed, some from Martha Stewart, Some from Best Recipes and my own recipe for Lemon Butter. I cant help but tweak everything :D


The Lovely batter for the cuppies is lemony, soft and just right. Pre-Heat your oven. Take the sugar and butter and cream, then plop in the eggs, flour, powder and milk to make a slightly liquidy batter.


Then spoon the batter into your cases. NOTE: these don't rise much so fill them to approx where you want the finished result. But remember you still have the meringue to pipe on. Bake until golden brown. While Baking mix together your meringue.


When baked cut a hole in middle. I made the Butter weeks ago and it was a perfect use for it. But never mind you can just make it the day before. TIP: I used an apple corer, worked a treat. Then once they are holey (he he) fill with your lemon butter, add as much or as little as you like as you are going to cover hole with meringue.


NOTE: See how they don't rise very much.

Once the holes are filled pipe on the meringue. I used a large star piping tip but be creative, you could do swirls, spoon it on for a rustic feel, or little piped stars for a classic Lemon Meringue look.


Once the meringue is in place, it should keep it form, brown the meringue. You can do this a variety of ways. Preheat your grill to high and place cupcakes under for a few minutes until brown. But I used my new favourite gadget a little blow torch. It is super cute and does everything from meringues to Brulee. I love it!!


Aren't these adorable!!!!
And so fun to make, and washing up for Hubby.


Recipe:
Cupcake:
125G Butter softened
1 1/3 C Caster Sugar
1/4 C Lemon Juice (fresh is best)
2 eggs
1 1/4 C Plain Flour
1 teaspoon Baking Powder
1 C milk
Lemon Butter:
125g Butter, cubed
1 C Sugar
4 eggs
Rind and juice from 4 lemons
Meringue:
3 Egg whites
170g Caster Sugar
Method:
Cakes:
1/ Pre-heat oven to 180C. Line muffin tine with liners.
2/ Cream Butte and Sugar together, until light and fluffy
3/ Add eggs one at a time, then add lemon juice
4/ Add flour, powder and milk alternatively until smooth
5/ Spoon mixture in cases about half way.
6/ Bake for 20-25 minutes until golden brown.
7/ Cut holes in center of Cupcake with apple corer
Butter:
1/ Melt butter and sugar together.
2/ Whisk in lemon juice and eggs to butter mix.
3/ Stir and simmer until thickened.
4/ Store in sterilised jars until required.
Meringue:
1/ Whip egg whites until fluffy.
2/ Add sugar while whipping spoonful at a time
3/Whisk for approx 10 minutes,
until you get firm peaks and a shiny glossy meringue
Assembly:
Cut holes in cupcakes with an apple corer or teaspoon
Spoon in Lemon Butter to taste
With a large star piping tip pipe meringue on top of cupcakes
Place cupcakes under hot grill for a few minutes until lightly browned or,
Scorch the meringue with a kitchen torch to get a lovely caramel colour.
ENJOY!!!


Monday, March 15, 2010


The Perfect Cookie


OK so I know I am going to cheese off some die hard toll house choc chippers out there, but these are the perfect cookies for the choc and peanut lover inside of me. I have made these so many times I can’t remember them all. These cookies are chewy in the middle and crunchy on the outside YUM!!
Recipe will be posted at the end, these are a one bowl cookie and sooooo easy to make. You can make them in minutes.


So take a bowl and slump in some brown sugar.

Add some peanut butter, you can use crunchy but I love smooth peanut butter.

Then add the bicarb-soda, flour and egg.

Mix well.....

Then come the choc chips...... a whole bunch of them.

Does anyone else love the clatter of chocolate chips???

All mixed together, now for the scooping.

I love to use a tiny ice cream scoop as it keeps them the same size, but a teaspoon of mixture rolled into a ball works just as well

TIP: Wet your hands slightly before rolling and you will have less dough sticking to your hands.


Perfect little cookie dough soldiers ready to go..... how brave

Bake for 10-15 minutes in a 160C oven. Be careful though they can burn easily so pull em out when they are lovely and golden.

And now (drum roll please.....)

Aren't they delicious looking. He seems to have a personality all of his own.


"Have a nice day cookie style"


Peanut Butter Choc Chip Cookies
Makes 35+

Ingredients:
¾C Brown Sugar
¾ C Peanut Butter (smooth or crunchy)
¼ C Plain Flour
1tsp Bicarb-Soda
1 egg, lightly beaten
1C choc chips.

Method:
1/ Preheat oven to 160°C and line baking tray.
2/ Combine sugar, peanut butter, bicarb, egg and flour in a bowl.
3/ When combined the mixture should be soft but not sticky.
Add choc chips.
4/ Scoop or roll teaspoonfuls of mix. Place on lined rays.
5/ Bake for 10-15 minutes until golden.
6/ Store in Airtight container for 3-4 days.

Thursday, March 11, 2010

Hummingbird Cake

Good afternoon bloggers! My first official post was always going to be, what I believe, to be the perfect Hummingbird Cake. This recipe has been tweaked, tried and tested – oh so many times! It is the perfect treat for a lazy afternoon, so grab some friends and some tea and enjoy.

Hummingbird Cake:
250g self-raising flour, 1 cup sunflower oil, 270g brown sugar, 2 eggs, lightly beaten, 1/2 tsp ground cinnamon, 1/2 tsp ground coriander, 440g can of crushed pineapple, drained well, 2 ripe medium sized bananas, mashed, 1/2 cup chopped walnuts and 50g desiccated coconut.

1. Preheat oven to 170°C.
2. Grease and line the base of a 20cm cake pan. Sift flour and spices into a large bowl. Add in your sugar, pineapple, coconut, banana, walnuts, eggs and oil. Gently stir to combine, be careful not to over mix.
3. Spread into lined pan and bake for 45 minutes or until a skewer inserted into the centre comes out clean.
4. Place on a wire rack and set aside to cool. Turn your oven down to 50°C.

Cream Cheese Icing:
100g cream cheese, 50g unsalted butter , tsp vanilla extract, 225g icing sugar, 1 cup finely chopped walnuts, to garnish (optional), 1 cup desiccated coconut (optional), Cookie cutter of your choice.

1. Once your cake has completely cooled, place all ingredients for your icing into an electric mixer. Mix on a low speed until they are just combine, slowly increase the speed and beat until smooth.
2. Using an angled spatular, spread the icing over the top and sides of your cake.
3. On a lined cookie tray, mix the coconut and 3/4's of the walnuts and spread evenly. Place in the oven until coconut is lightly toasted. Remove and let cool.
4. Place your cookie cutter in the center of your cake and with the remaining walnuts, fill the shape until no icing can be seen.
5. Using your hands, gently press your coconut/walnut mixture to the sides of your cake.